Direct
Overview
The Moneris Go solution offers three unique integration methods to suit your specific setup. Each method delivers the same core payment processing capabilities. It is important to note that you are not locked into an integration method and you can choose a different method at any point. The right integration choice depends on your existing infrastructure and how easily it can integrate with Moneris Go. This section will go through all the integration methods so you can make an informed decision on which integration method to use.
Direct
The direct integration enables your POS system to send transaction requests locally with your Moneris Go device over your LAN. Transaction requests are sent directly to your Moneris Go device for validation and fulfilment. This integration method is ideal for on-premises POS systems, offering low latency, real-time communication, offline fallback support, and fewer external dependencies. This method requires tighter coupling to hardware and your network environment.
Configuring device to Direct Mode
Start by setting up your device for the integration mode you’ve chosen. Here’s how to get it ready for direct mode:
Note
If you are using a Moneris Go (Ivory), Moneris Go (Onyx) or Moneris Go Slim device, you will need to download the Moneris Go Integrated application from the app store.
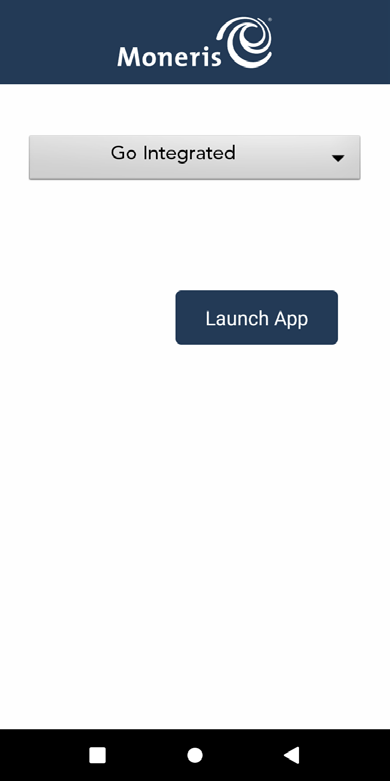
1. Tap on the Launcher icon on your Moneris Go device’s home screen.

2. Select Go Integrated from the dropdown menu, tap Launch App.
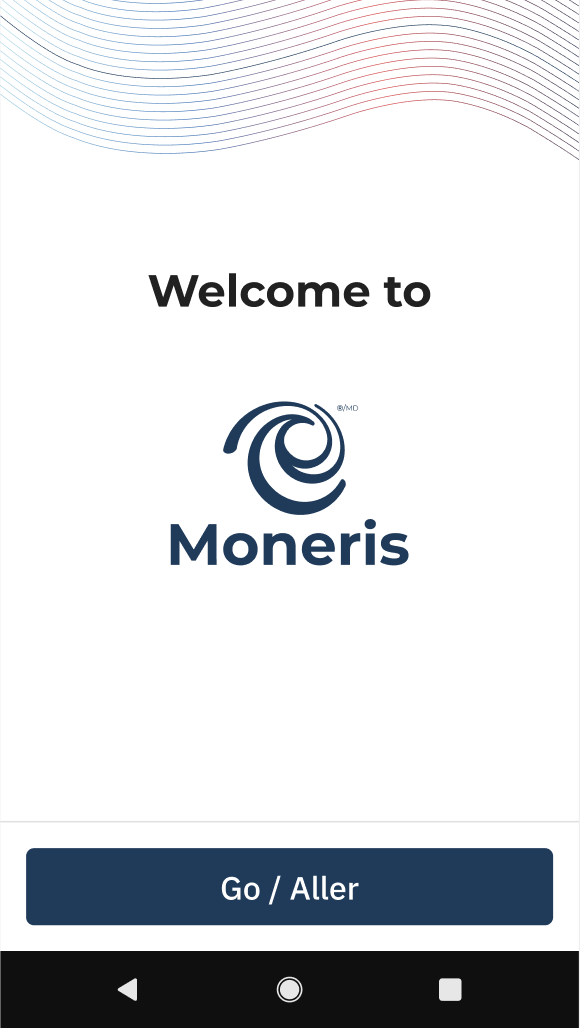
3. Wait while your device syncs with Moneris.

4. Tap Go to begin configuring your Moneris Go Integrated application.
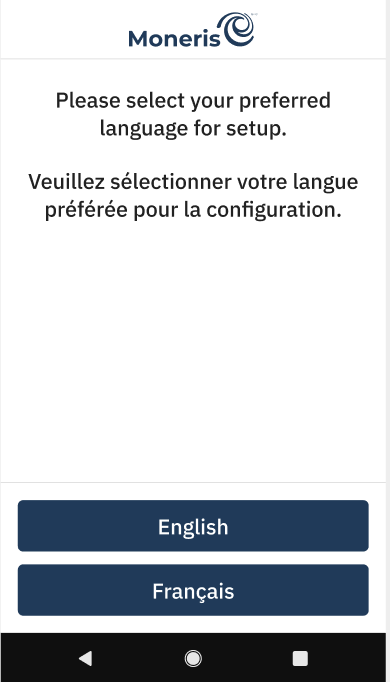
5. Select a language.
NOTE:
This is used to set up the language for the initial integration setup only. This is not the language that will be used for the Moneris Go device.
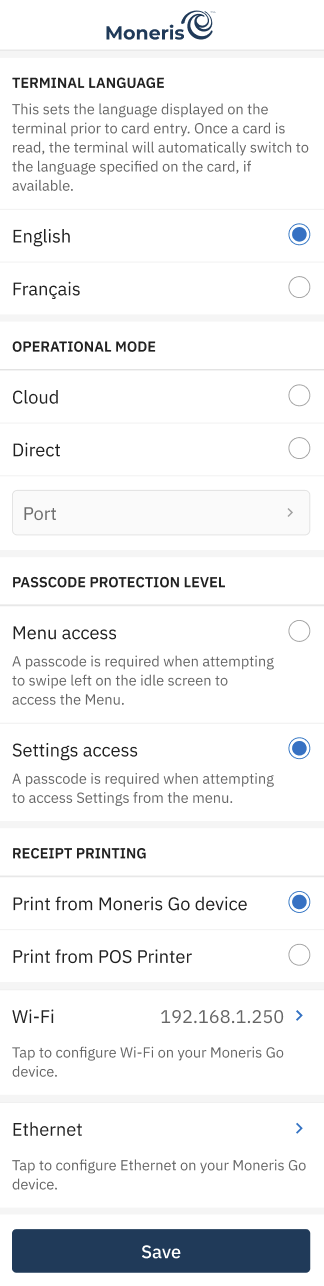
6. On the following Settings screen select:
-
Tap English or Français to select the language for the device to communicate with Moneris.
-
Operational mode: Choose Direct.
- Note: The default option is blank. If you select Direct, it will display the Port default value of 1180.
- Note: If you change the Port value, an error message is displayed for an invalid Port number between 0 and 1179.
- Note: An error message is displayed if an Operational mode is not selected.
- Note: The default option is blank. If you select Direct, it will display the Port default value of 1180.
-
Passcode protection level: Choose Settings access or Menu access. Passcode protection level controls whether a passcode is required to open the menu or the settings screen.
- Note: The default option is Settings access.
- Note: If Menu access is selected, you will need to enter a Passcode to exit the application after swiping left on the idle screen.
-
Receipt Printing: Choose Print from Moneris Go device or Print from POS Printer.
- Note: Cardholder choice should be enabled in Receipts settings.
- Print from Moneris Go device will print a physical receipt when the cardholder selects print in receipt options.
- Print from POS Printer will not print a physical receipt when the cardholder selects print in receipt options.
- Note: The Receipt Printing option only appears on devices with on-board printers. The POS will always receive the receipt payload in the transaction response, irrespective of the device.
- Note: Cardholder choice should be enabled in Receipts settings.
-
Wi-Fi: Tap Dynamic or Static IP Address for POS connection.
- Note: You may need to configure these features in the Android setup, then return to this screen to continue.
- Note: If the terminal has an internet connection, the IP Address will be displayed below in green.
-
Ethernet: Tap Dynamic or Static IP Address for POS connection.
- Note: The Ethernet button is only displayed if the device and/or hardware supports Ethernet connectivity.
- Note: If the terminal has an internet connection, the IP Address will be displayed below in green.
Tap Save to continue to the next screen once you are happy with the settings.
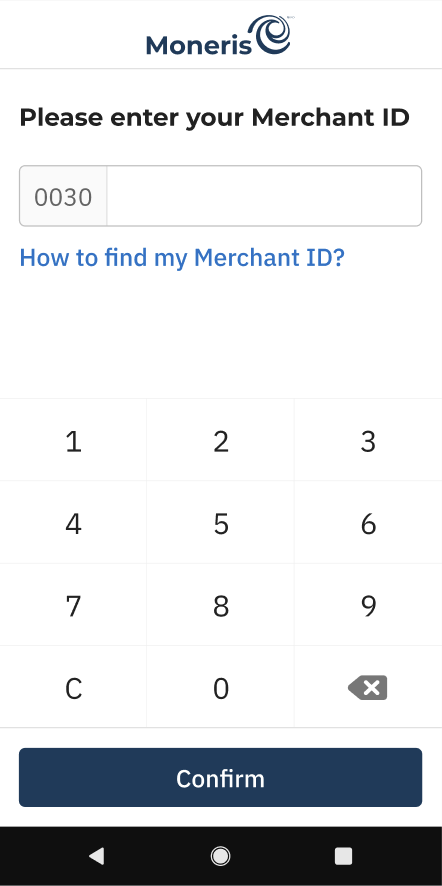
7. Enter the last 9 digits of your 13-digit Merchant ID that was provided to you in your welcome email and tap Confirm.
NOTE: You only have three attempts to enter your Merchant ID.
8. Your Moneris Go device is now configured in direct mode. Tap OK to navigate to the idle screen.

Support
Contact Moneris Customer Support if you're facing issues during this process.
Integrating direct method
The direct integration method handles both requests and responses synchronously. This means that your point of sale (POS) will send the request and wait until your Moneris Go device provides the final response. All of the requests and responses exchanged with the device are over TCP socket connection to the device’s IP and port that was specified during the device configuration phase.
NOTE:
An IP address combined with a port number is typically represented in the IP:port. For example, 192.168.1.10:8080.
The type of functionality that will be executed is dependent on the "action" value that you send in the request. here is an example of a Purchase request. To view the full list of available requests, visit the API spec page.
{
   "apiVersion": "3.0",
   "istConfigCode": "example_istConfigCode",
   "dataId": "example_dataId",
   "dataTimestamp": "1969-12-31 23:59:59",
   "data": {
      "request": [
         {
            "idempotencyKey": "example_idempotencyKey",
            "action": "purchase",
            "totalAmount": "1110",
            "progressStatus": "true"
         }
      ]
   }
}
NOTE:
Moneris recommends that merchants have a one-to-one setup between their Point of Sale (POS) and a Moneris Go device. Multiple POSs can connect to the same Moneris Go device, however only one transaction can be processed at a time. The Moneris Go device will respond with a Terminal Busy Error response like the one shown below if a connection is made while it is processing a transaction.
{
   "apiVersion": "3.0",
   "statusCode": "5461",
   "status": "Terminal busy",
   "dataTimestamp": "1969-12-31 23:59:59",
}
Understanding response structure
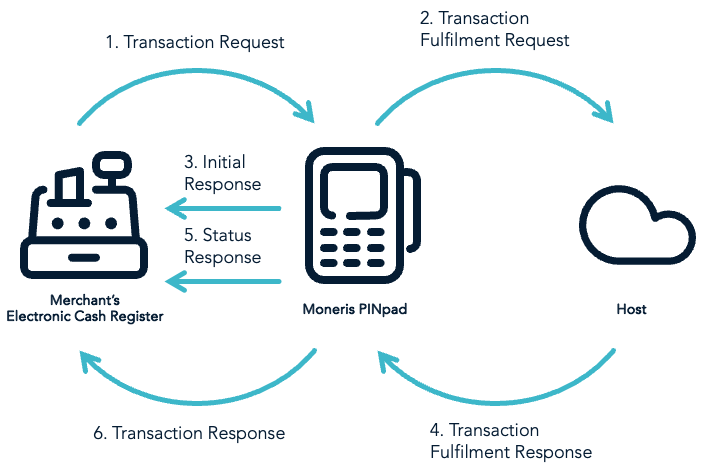
By default, when a transaction request is sent to the Moneris Go device only the final transaction response is returned. However, if the request includes the "progressStatus" value of "true" then progress responses will be sent back to your POS. There are two types of optional progress responses:
NOTE:
Your requests need to be pre-fixed with two-bytes containing the message request length or the request will be rejected automatically. The responses you receive will also contain a pre-fix of two-bytes that contain the response message length.
- Initial response: Once a transaction request is sent, the Moneris Go device will perform validation on the request by verifying all the parameters. This response will contain an approval or refusal of the transaction. If it is a refusal, the Moneris Go device will send back an error message containing the details of the error.
- Status response: After the transaction request has been approved, the Moneris Go device will send status responses based on the stage the customer is at in the transaction process. Transaction process stages include “Tip Screen", “Card Entry Screen”, “Cashback Screen” etc. Every time the status of the transaction changes a new status response will be sent or if the status doesn’t change for 5 seconds a status response is also sent.
Sample initial and status response
{
   "apiVersion": "3.0",
   "statusCode": "example_statusCode",
   "status": "5201",
   "dataId": "Request accepted. Transaction process started",
   "dataTimestamp": "1969-12-31 23:59:59",
   "data": {
      "response": [
         {
            "idempotencyKey": "example_idempotencyKey",
            "statusCode": "5201",
            "status": "Request accepted. Transaction process started",
            "completed": "false"
         }
      ]
   }
}
Once the Moneris Go device has processed the transaction it will send the POS a transaction response message. This is the final message sent to your POS before your POS disconnects from the Moneris Go device so a new transaction can be sent.
Sample response message
{
   "apiVersion": "3.0",
   "statusCode": "example_statusCode",
   "status": "example_status",
   "dataId": "example_dataId",
   "dataTimestamp": "1969-12-31 23:59:59",
   "data": {
      "response": [
         {
            "orderId": "example_orderId",
            "transactionId": "example_transactionId",
            "statusCode": "example_statusCode",
            "status": "example_status",
            "idempotencyKey": "example_idempotencyKey",
            "completed": "true",
            "responseCode": "example_responseCode",
            "iso": "example_iso",
            "approvedAmount": "1300",
            "tenderType": "example_tenderType",
            "cardType": "example_cardType",
           "sequenceNum": "example_sequenceNum",
           "realTimeUniqueId": "example_realTimeUniqueId",
           "authCode": "example_authCode",
           "formFactor": "example_formFactor",
           "maskedPan": "example_maskedPan",
           "action": "purchase",
           "receipt": "example_receipt",
           "receiptChoice": "PRINT"
        }
     ]
  }
}
Sample error
If there is an issue with the transaction, an error response will be sent detailing the type of error.
{
   "apiVersion": "3.0",
   "statusCode":   "example_statusCode",
   "status": "example_status",
   "dataId": "example_dataId",
   "dataTimestamp": "1969-12-31 23:59:59",
   "data": {
      "response": [
         {
            "idempotencyKey": "example_idempotencyKey",
            "orderId": "example_orderId",
            "statusCode": "example_statusCode",
            "status": "example_status",
            "linkId": "example_linkId",
            "errorDetails": [
               {
                  "errorCode": "example_errorCode",
                  "parameter": "example_parameter",
                  "value": "example_value",
                  "issue": "example_issue",
               }
            ],
            "completed": "true"
         }
      ]
   }
}
Updated 2 months ago